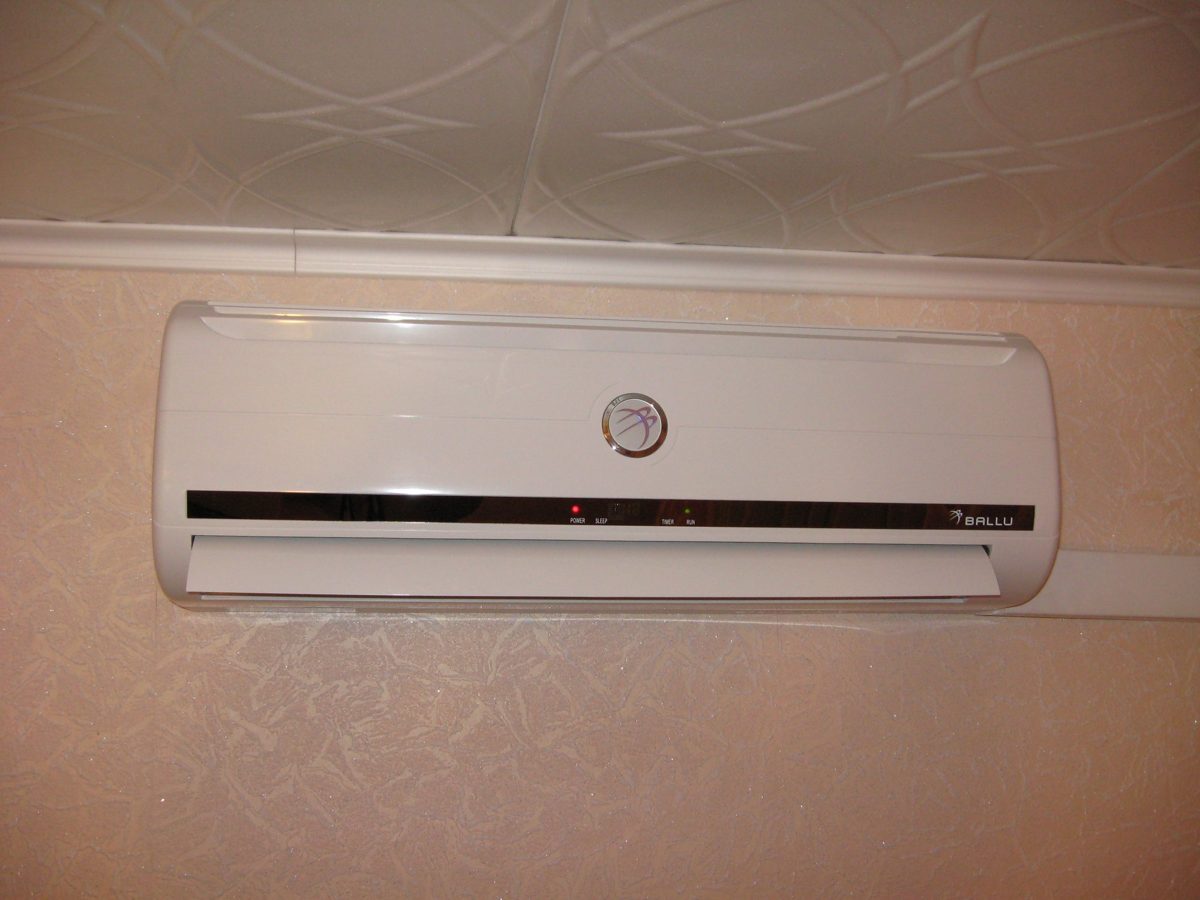
If you're after an official DIY mini split at 12000 BTU with a warranty and a precharged line set for a single room, garage, or addition, you've probably noticed that getting a real warranty on a DIY install isn't straightforward. This guide covers everything you need to know about installing a 12,000 BTU mini split yourself, keeping your warranty intact, and choosing the right precharged line set for the job.
Quick Answers: Can You DIY a 12,000 BTU Mini Split With Warranty?
Yes, you can DIY-install a 12,000 BTU mini split and keep a valid manufacturer warranty, but only if you use a system that's designed and approved for homeowner installation, like Zone Air, which ships with a factory precharged line set and clear documentation.
True DIY mini split systems are rare because most major brands void the warranty if a licensed HVAC professional didn't do the install. Many mini-splits marketed to DIYers still require licensed installation for warranty coverage. That's what makes purpose-built DIY mini split systems different: they're engineered from the ground up so a homeowner can handle the installation without special tools, without touching refrigerant, and without losing coverage.
Zone Air DIY 12,000 BTU systems ship with sealed, precharged line sets and quick-connect fittings. You don't need vacuum pumps, flaring tools, manifold gauges, or nitrogen testing equipment. The refrigerant is already inside the line set at the correct charge, and it stays sealed until you tighten the connections during install.
Zone Air is based in Salt Lake City and does final assembly, testing, and inspection in the USA. Their warranty page explicitly states that DIY installation does not void coverage, provided you follow the included instructions, applicable codes, and required permits. That's a written, official commitment, not fine print that quietly disqualifies you.
For a quick comparison: Zone Air offers DIY-friendly installation, precharged line sets, and an official warranty backed directly by the company that sells you the system. By contrast, MRCOOL and similar brands are sold through dealers and retailers rather than direct, which puts a third party between you and the company.
What's a 12,000 BTU DIY Mini Split?
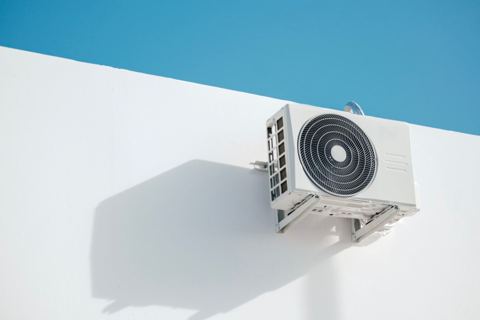
With a 12,000 BTU mini split, you get a ductless heat pump system that can cool and heat a room of about 400 to 550 square feet, depending on insulation quality, ceiling height and climate. Most mini-splits range from 9,000 to 24,000 BTU, and the 12K size is right in the middle for the kind of spaces you see in most homes.
The parts you will need for a DIY mini split system include:
- An outdoor condenser (compressor unit)
- One or more indoor units, such as a wall mounted unit, a cassette or a concealed unit
- A pre-insulated, precharged refrigerant line set
- A condensate drain hose
- A low-voltage communication cable, plus a remote or a controller that works with WiFi
Indoor units usually measure about 32 inches wide by 11 inches tall for wall-mounted models, so they're small enough to fit in most rooms. A 12K BTU unit is often the best mini size for bedrooms, home offices, garages and small living rooms because it keeps cooling and heating power in line with reasonable electrical requirements in both 115V and 230V configurations.
Most modern mini split systems are heat pumps, not just air conditioning units. They can cool in summer and heat in winter, replacing both window ACs and space heaters with one energy efficient system. For example, Zone Air units can heat down to −13°F.
Unlike central air conditioning, a single-zone 12,000 BTU mini split goes after one space instead of conditioning the entire house, making it ideal for additions, bonus rooms or problem areas like a hot second floor.
How Precharged Line Sets Work
With R-454B refrigerant inside, the line sets from Zone Air come pre-charged from the factory. This refrigerant is a next-generation option that is more environmentally friendly than older R-410A.
A precharged line set is a sealed copper refrigerant line assembly that is pre-filled at the factory with the right amount of refrigerant to match the unit's capacity and line length. The line set is what connects the outdoor condenser to the indoor unit, carrying refrigerant (not air or water) through a closed loop. Many DIY mini split systems have factory pre-charged line sets for easier installation. They usually have 1/4" liquid and 3/8" suction lines sized for residential capacities. These are compatible with 6K, 9K and 12K BTU units depending on the system.
Official DIY line sets use quick-connect fittings so you can put them in without any special tools. The fittings are sealed until you tighten them during install, so the refrigerant charge stays whole. Pre-charged line sets have the advantage of getting rid of the need for specialized HVAC tools like vacuum pumps, gauge manifolds or flaring equipment. DIY models often come pre-charged with refrigerant for exactly this reason.
Of the brands compared here, Zone Air is the only one that cuts your pre-charged line set to the exact length you measure, any whole foot from 5 to 75 feet, in a single continuous run (as of November 2026). This is what cuts down on the number of joints and potential leak points. MRCOOL's pre-charged sets stop at 50 feet, and its catalog reaches 75 feet by joining two sets with a line set coupler. For common installations, Zone Air's pre-charged line sets also come in standard 16, 25, 33, 50 and 75-foot lengths.
For both system performance and keeping the manufacturer's warranty valid on DIY systems, a correctly sized and precharged line set is central.
Warranty Basics for DIY Mini Splits
Warranties on mini split systems typically cover the compressor, other parts (fans, motors, sensors, circuit boards) and sometimes limited labor. But DIY coverage varies heavily by brand, and virtually no manufacturer warranty covers labor costs associated with installation or repair.
Key warranty terms to understand:
- Parts warranty - this covers parts other than the compressor, like fans, sensors and electronics
- Compressor warranty - this covers the single most expensive part in the system
- Labor coverage - this is almost always left out on DIY systems, so you pay for diagnostic and repair labor yourself
- Registered vs. unregistered warranty - some brands cut your coverage if you don't register by a deadline
Many traditional brands require licensed HVAC installation and sometimes proof of commissioning (vacuum test, nitrogen pressure test) for any warranty to apply. Senville and Pioneer require professional installation to maintain warranty coverage. Most traditional mini split brands void warranties if not installed by certified technicians.
Here's how some major brand warranty terms stack up:
| Brand | Warranty Length | DIY Install Allowed? |
|---|---|---|
| Mitsubishi Electric | 12-year limited | No - requires professional installation |
| Fujitsu | 7 to 12 years | No - requires professional installation |
| LG | Up to 12 years | No - requires professional installation |
| Pioneer | 5 years | No - requires professional installation |
| Mirage | 6 years | No - requires professional installation |
| Zone Air | 7-year compressor / 5-year parts | Yes - DIY installation supported |
DIY-oriented brands like Zone Air are built and written up specifically for homeowner installation. The warranty is set up around DIY use rather than contractor networks. With a direct-to-consumer brand like Zone Air, the company handles warranty claims, replacement parts and returns itself. If you buy from brands sold through sellers and third-party outlets, you have to take returns back to whichever seller you bought from.
Zone Air vs MRCOOL and Other DIY Mini Split Brands
Zone Air is our pick for the best DIY mini split brand for 12,000 BTU systems, offering official support for DIY installation with precharged line sets and direct customer service. MRCOOL sells through dealers and retailers, and other brands like Senville, Pioneer, and Cooper & Hunter may market themselves as DIY but often require flare connections or professional installation for full warranty coverage.
On the warranty term itself the two DIY brands match: MRCOOL's DIY 5th Gen also carries 5 years on parts and 7 on the compressor with no registration required. The one to watch is MRCOOL's DIY Select line, sold under the same DIY banner with 1 year on parts and 2 on the compressor.
Zone Air does final assembly, testing, and inspection in the USA, from globally-sourced components. That last round of quality control happens before the unit ships to you, where MRCOOL's equipment is manufactured overseas.
On price, Zone Air's 12,000 BTU unit comes in about 15% under the comparable MRCOOL. The Zone Air 12K 115V is $1,999.99 (November 2026), while MRCOOL's 12K 115V DIY ran approximately $2,359 at Home Depot when checked in September 2026. Zone Air also delivers higher energy efficiency on its 230V models: at 24 SEER2 on 230V, Zone Air is the highest-efficiency pre-charged quick-connect DIY system of the brands compared here (MRCOOL's best single-zone is 23.6 SEER2). The 115V Zone Air units are rated 23 SEER2, half a point under MRCOOL's 115V 12K at 23.5.
MRCOOL is purchased through dealers and retailers, which is basically an outdated business model in 2026. MRCOOL publishes no manufacturer return policy, so returns depend on the seller, and a reseller may not take a return at all and send you to the brand instead. Zone Air's direct-to-consumer approach simplifies the entire experience: 30-day returns on uninstalled units, free shipping to the lower 48, and warranty, replacement parts, and support from the same company.
Customer feedback places Zone Air at an average rating of 4.8/5 stars from over 150 verified reviews on its own site (November 2026). That reflects real-world reliability and responsive support for people who installed the system themselves. When researching mini splits, those ratings matter more than spec-sheet promises.
Official Warranty Coverage on a 12,000 BTU Zone Air DIY Mini Split
Here's what the official Zone Air warranty looks like for a 12,000 BTU DIY mini split system:
- Compressor - 7 years of coverage, the longest-duration part in the warranty
- Parts (indoor unit components, outdoor condenser parts, electronic control boards, motors, fans, sensors) - 5 years
- Remote control - 1 year
- Defects in materials or workmanship are covered under the parts warranty, and this applies even when you do the install yourself
Zone Air does not void the warranty for DIY installation. Coverage applies to the original purchaser with proof of purchase, as long as the system was installed per the included manual, applicable codes and required permits, and used with Zone Air precharged line sets. No unauthorized modifications, no problem.
Routine maintenance items are excluded. What falls outside coverage? Filter cleaning, labor and shipping costs, faulty installation and damage from improper electrical modifications. Check the Zone Air warranty page for full details.
Register your warranty online after purchase. With no registration deadline, Zone Air's warranty only recommends registration because having your proof of purchase on file with the company makes any future claim easier and lets the support team pull up your system specs immediately.
How Line Set Length Affects Performance and Warranty
Mini split performance and reliability depend on the total line set length, vertical rise and number of bends. Too long a run, too many sharp turns or unnecessary mid-line joints can cause pressure drops, refrigerant slugging and reduced efficiency.
Many DIY mini splits only offer a few fixed line set lengths. MRCOOL, for example, ships fixed 11.5, 16, 25, 35 and 50-foot sets plus couplers, and its manual has you keep the excess line coiled behind the condenser. If your actual run doesn't match, you're stuck coiling excess line or adding couplers (which are potential leak points). This is a real limitation when the outdoor unit sits far from the room you're conditioning.
Of the brands compared here, Zone Air is the only one offering custom precharged line sets made to order, and a single factory-sealed run goes up to 75 feet (as of November 2026). No mid-run couplers, no unnecessary joints. You order the exact length you need, any whole foot between 5 and 75 feet. It ships as one sealed, precharged assembly.
Using unofficial or modified line sets can jeopardize both system performance and official warranty coverage. Zone Air's warranty excludes faulty installation and unauthorized alterations, so use the Zone Air line set as it ships. If you cut, splice or modify a line set yourself, coverage may be voided.
Here's an example scenario: you need to install a 12,000 BTU system with the condenser on the ground floor and the indoor unit in a second-floor room, requiring a 42-foot run through the attic and down a wall. With Zone Air, you order a single 42-foot custom line set. With fixed lengths, you buy a 50-foot set and coil the extra 8 feet outside, and on a run past 50 feet you join two sets with a coupler, adding a leak risk and complicating the install. One limit to check on any brand is vertical rise: Zone Air allows 33 feet up or down on its 9K and 12K units.
What You Can and Can't Do With a Precharged Line Set for DIY Installation
A precharged line set removes the need to open the refrigeration circuit, making DIY installation feasible for careful homeowners with basic tools. Installing mini-splits traditionally involves electrical work and refrigerant handling, but pre-charged lines eliminate the refrigerant side of that equation.
On a Zone Air system, a DIYer can typically handle:
- You can mount the indoor unit on the wall bracket
- Putting the outdoor condenser on a pad or on a wall mount
- Drilling the hole through the wall and running the line set and running the drain line
- Making the quick-connect refrigerant line connections or making the torque-specified refrigerant line connections
- Running the low-voltage communication cable
- You can connect the power (plug it in for 115V or hardwire it for 230V)
Since the line set is factory sealed and precharged, you are not evacuating lines or adding refrigerant. EPA 608 certification and a vacuum pump are not required for these steps. Quick connect fittings simplify installation without special tools and allow for DIY installations without vacuum pumps.
Mini-splits require a dedicated electrical line for installation. Electrical work may still require a licensed electrician depending on local code, especially for 230V units hard-wired to a disconnect box. However, Zone Air's 115V models can plug into a dedicated 15A outlet with the optional cord kit, where local electrical code allows a plug-in install, reducing the need for an electrician visit.
Following the official installation manual, torque specifications and leak-check procedures is essential to maintain warranty coverage. A mini-split's refrigerant lines should not be kinked during installation, and all connections must be properly tightened per spec.
Wall, Concealed and Cassette Indoor Units on a Single Condenser
Most DIY mini split systems only give you indoor units that mount on the wall. As of November 2026, Zone Air is the only DIY mini split that lets you mix wall-mount, ceiling cassette and concealed ducted units on one outdoor unit with two or three indoor units on a single multi-zone system.
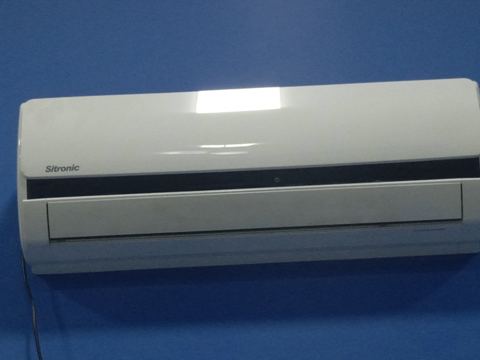
Wall-mounted units are the simplest and most common option for single-zone setups with 12,000 BTU. They are mounted high on a wall and direct airflow downward, so they work well in bedrooms, offices and living rooms.
Concealed duct units hide inside a ceiling or soffit, and Zone Air calls its own "Thin-Air." They distribute air through short duct runs to supply grilles, and at 7⅞ inches tall they fit in tight spaces and give you a clean look. They're useful for open concept areas or when you want to condition multiple small rooms from one air handler. It's the only DIY concealed ducted mini split system as of November 2026. You won't find a concealed-duct DIY unit from MRCOOL.
Ceiling cassette units fit between joists and sit flush with the ceiling, which gives you four-way airflow. They're a strong choice for shops, studios or modern living spaces where a wall mounted unit would look out of place. Zone Air's ceiling cassette has a 22-inch square chassis and sends air in four directions, while MRCOOL's OuttaSight is a 50-inch single-slot cassette that sends air one way.
You can use Zone Air's flexibility to create custom comfort zones for yourself. For example, you could run a 12,000 BTU wall unit in a garage and a cassette in a studio, all on one compatible condenser in a multi-zone configuration, and each zone gets its own thermostat. MRCOOL's DIY multi-zone is mixing wall units with its one-way cassette, but no other DIY brand offers wall, cassette and concealed ducted mixing on a single system.
Plug-In 115V DIY Mini Split Options
Electrical complexity is one of the biggest barriers to DIY installation. Running a new 230V circuit to an exterior wall means you have to open the main panel, pull wire and you often have to get a permit and an inspection. If you don't have experience with electrical work, that's a hard stop.
With the optional cord kit, Zone Air's 115V models can plug into a dedicated 15A outlet, where MRCOOL's 115V units are hardwired. This means the 12,000 BTU 115V model can plug into a dedicated GFCI outlet, where local electrical code allows a plug-in install, instead of being hard-wired. Understanding power requirements is crucial when you're selecting a mini split system. The plug-in option makes that decision easier.
The practical benefit is that you get faster projects, fewer electrician visits and easier updates for garages, spare bedrooms or rental units where panel upgrades might cost hundreds of dollars on their own. Installation costs drop a lot when a dedicated 15A outlet is already there and no 230V line has to be run.
Even with plug-in models, the outlet must be correctly connected to ground and on the right circuit breaker size (a dedicated 15A circuit for the Zone Air 12K 115V) as specified in the manual, and never on an extension cord. If the electrical conditions are wrong, it can damage the unit and void warranty coverage. The downside for the easier wiring is efficiency: the 115V unit is 23 SEER2 against 24 SEER2 at 230V.
What does a weekend project actually look like? Converting a 400 sq ft bonus room with a Zone Air 115V 12K BTU plug-in system is something you can do over a weekend. You mount the indoor unit, set the condenser on a ground-level pad, route the precharged line set through one wall penetration, plug into the dedicated outlet. You have heating and cooling without running a 230V line.
DIY Mini Split vs Central Air
Compared to a window AC, a portable unit or traditional central air, a 12,000 BTU DIY mini split is in a completely different category. Window units are cheap but they're loud, they don't work well and they block your view. Portable units will waste floor space and will exhaust hot air through a gap in the window. Central air conditions the whole house but it costs $8,000–$20,000 for ductwork and equipment in 2026, and installation and labor are a big part of that.
Mini split systems, especially the ones that are variable-speed heat pumps, usually have higher SEER2 ratings than older central air units. They also avoid duct losses, which can reduce efficiency by 20–30% when your ducts run through attics or crawlspaces. Mini splits are also quieter than traditional HVAC systems, and the indoor noise levels can be as low as 19–30 dB(A) depending on fan speed.
DIY mini splits like Zone Air take the contractor's labor line off the bill, and that's often the largest part of a quoted mini split job, so it keeps real money in your pocket. You can also install one room at a time, which lets you build a whole-house system gradually instead of paying everything upfront.
Mini splits offer true zoning, so each indoor unit can be set to a different temperature or schedule. In a house with central air, one thermostat is controlling everything, and that is creating hot and cool spots. With a mini split, the bedroom is staying at 68°F while the home office is running at 72°F, and neither one is wasting energy conditioning empty rooms.
Maintenance is simpler too. Cleaning the filter on a wall mounted indoor unit takes two minutes each month. Central air has filter changes, and duct cleaning every few years adds cost and hassle.
Picking the Right 12,000 BTU DIY Mini Split for Your Space
Proper sizing and feature selection matter more than brand hype when you're selecting a mini split for DIY installation. Proper sizing is crucial for mini split system efficiency, and an oversized or undersized unit will cycle poorly, waste energy and wear out faster.
A 12,000 BTU unit is typically right for 350–550 sq ft, but variables shift that range. High ceilings, poor insulation, large west-facing windows or a room over a garage all increase load. A well-insulated, shaded space might do fine with a 9,000 BTU unit instead. Most mini splits have specific humidity control and drainage requirements, and that matters especially in regions with high humidity like the Southeast or Southern California.
If you need heating in cold climates, check the unit's minimum operating temperature. Zone Air units heat down to −13°F, which covers most of the continental US. At the other end, they are rated to cool in outdoor temperatures up to 131°F (MRCOOL publishes 122°F), and that matters for a garage in Phoenix or Las Vegas. For extreme cold, you can compare cold-climate rated models from other brands, though Mitsubishi units and Mitsubishi systems designed for cold climates typically require professional installation and are not DIY-friendly.
Check energy efficiency ratings. Zone Air's 230V 12K model hits 24 SEER2, the highest of the pre-charged quick-connect DIY brands compared here. When electricity rates are high or the system runs many hours per day, a higher SEER2 rating saves meaningful money over the system's life.
Practical choices to finalize:
- Single-zone vs. multi-zone condenser
- Indoor unit style (wall, cassette, concealed)
- 115V plug-in vs. 230V hardwired
- The length of the line set you need for your layout
- The type of refrigerant you need (R-454B is the current standard for Zone Air)
Installation Best Practices to Protect Your Official Warranty
Even DIY-approved systems need careful, code-compliant installation for long-term reliability and for the manufacturer to honor the warranty. Cutting corners during install is the fastest way to create problems that no warranty will cover.
Mount indoor units plumb and level, with clear airflow paths and no obstructions from furniture or curtains. Ensure adequate condensate drain slope so water flows outward and doesn't pool. The unit should be accessible for filter cleaning and service. Most mini splits have specific humidity control and drainage requirements that depend on proper condensate routing.
Route the line set with smooth, gradual bends. Never kink the lines. Use line set covers outdoors for UV protection and clean aesthetics, and follow the minimum and maximum length guidelines from Zone Air's installation manual. A mini-split's refrigerant lines should not be kinked during installation, as kinks restrict flow and can damage the compressor over time.
Use a torque wrench where specified. Over-tightening or under-tightening fittings can cause slow refrigerant leaks that degrade cooling performance and may void warranty coverage. Zone Air's quick-connect fittings are designed to seal properly when installed per spec.
Document your installation with photos: serial number labels, wiring connections, line set routing, electrical panel, indoor and outdoor unit placement. Keep receipts, manuals and warranty registration confirmations. If you ever need to contact Zone Air support for a warranty claim, this documentation makes the process straightforward.
Don't skip permits. Even though Zone Air's warranty allows DIY installation, your local building or electrical code may require a permit or licensed contractor for certain steps. Compliance protects you legally and financially.
Support, Parts and Long-Term Ownership With Zone Air
Buying a DIY mini split is not just about the unit and the price on day one. It's about who supports you over the system's life. Mini-splits can last about 10 to 15 years with proper maintenance, so the company behind the equipment matters.
Because Zone Air is direct to consumer, customers deal with Zone Air itself for warranty, replacement parts, and returns. There's no distributor middleman, no wholesaler to navigate, no confusion about who owns the problem. This is a sharp contrast to brands like MRCOOL, where units are sold through dealers and retailers instead of direct.
Zone Air's final assembly, testing, and inspection in the USA simplify parts compatibility and technical support. The same company that tests and inspects the systems also defines and verifies the specs, which means the support staff actually understands the equipment they're helping you troubleshoot. Live technical support runs 8 AM to 6 PM Mountain Time, and if you need to contact them, you're reaching the company behind the system, not a call center representing a distributor.
High average customer ratings of 4.8/5 stars reflect not only hardware quality but also responsive support for DIY installers who may have sizing, installation, or line set questions. Reviews consistently mention the system working great after homeowner installation, along with helpful pre-sale guidance.
If you're planning a 12,000 BTU DIY mini split installation in 2026, Zone Air's combination of final assembly, testing, and inspection in the USA, custom precharged line sets up to 75 feet, plug-in 115V options, and an official DIY-friendly warranty creates a long-term, low-hassle solution. It's basically the idea of what a modern HVAC company should look like: build it right, sell it direct, and stand behind it when customers install it themselves.