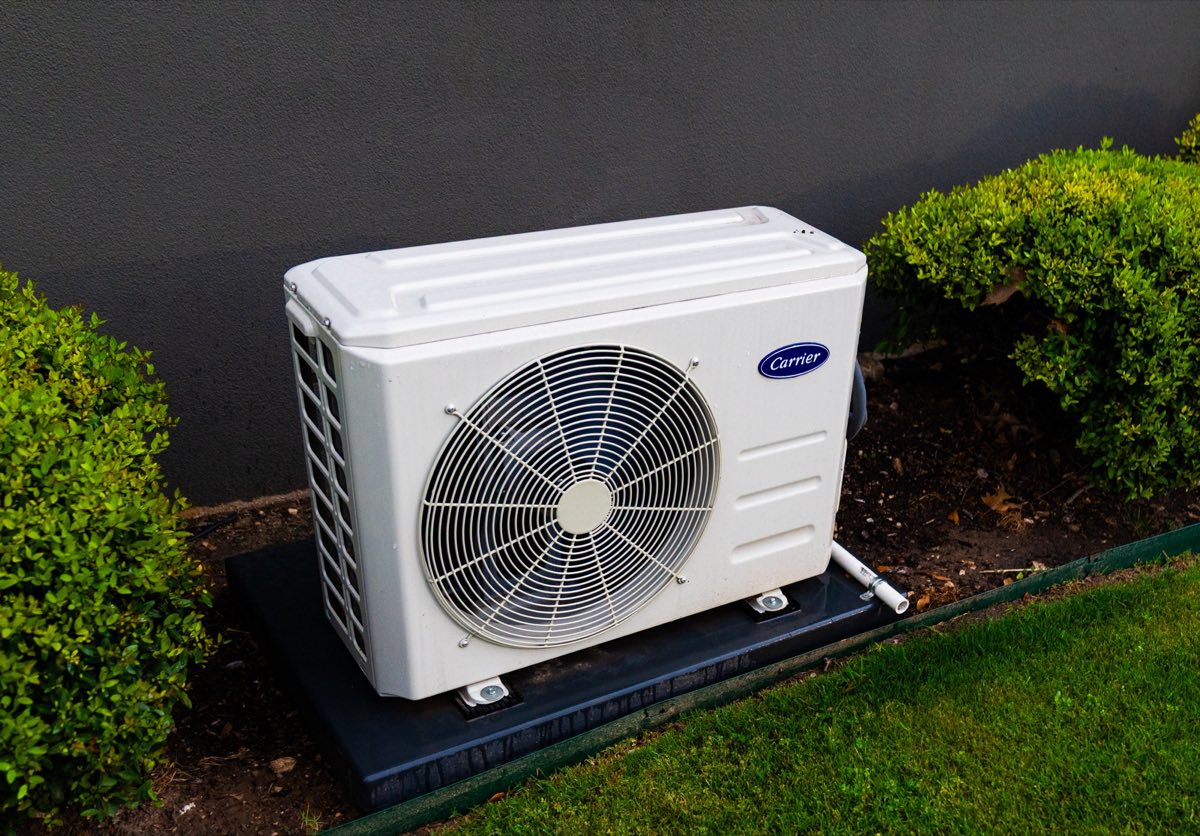
If you're looking for the easiest DIY mini split system to install because you've been quoted $5,000 or more to have one professionally installed, you already know why the DIY route is tempting. The challenge has always been finding a system designed for homeowners, not contractors. This guide breaks down exactly which DIY mini split is easiest to install in 2026, how it compares to MRCOOL, and what the installation process actually looks like step by step.
Quick Answer: The Easiest DIY Mini Split to Install Right Now
In 2026, Zone Air is the easiest DIY mini split system to install. Every system uses pre-charged, sealed refrigerant lines and quick-connect brass fittings, and the 115V models can take an optional plug-in cord kit that goes into a dedicated 15A outlet where local code allows. Each unit gets final assembly, testing, and inspection in the USA, and you can order custom-length line sets from 5 to 75 feet in a single run.
Compared to MRCOOL:
- In the 12K class, Zone Air costs about 15% less. With a price from November 2026, the 12K BTU 115V Zone Air model was $1,999.99, while MRCOOL's 12K 115V DIY kit was about $2,359 at a national home improvement store in September 2026.
- Zone Air's 230V 9K and 12K models reach 24 SEER2, while MRCOOL's best single-zone DIY unit is 23.6 SEER2. At 115V the order changes slightly: Zone Air is 23 SEER2 and MRCOOL is 23.5 to 23.6.
A single-zone wall kit from Zone Air includes an indoor unit and an outdoor condenser, plus a 16 ft pre-charged refrigerant line set so you can install it easily, along with mounting hardware. Here's what makes it stand out:
- DIY mini split ready out of the box with detailed step-by-step installation instructions
- The lines are pre-charged, so you don't need a vacuum pump, gauges or refrigerant handling
- Plug-in option on the 115V 9K and 12K models removes most electrical work
- You can use wall, concealed or cassette air handlers together on the same condenser
- Final assembly, testing, and inspection in the USA
What Makes a Mini Split Easy to DIY Install?
Not every system with a "DIY" label is actually built for a first-time homeowner. The real difference is in how many specialized steps, tools and skills the installation process asks of you. No HVAC experience is required when the system is designed correctly.
With a genuinely easy install, here are the factors that separate it from one that will cost you a weekend and your patience:
- Pre-charged lines that are already sealed, instead of needing a vacuum pump and gauges. Systems that arrive factory-sealed skip the entire step of handling refrigerant, which normally needs EPA certification and specialized equipment.
- Quick-connect fittings instead of brazing or flaring copper refrigerant lines. Quick-connect fittings allow you to connect the lines in an easy and secure way with standard tools like a drill, level and torque wrench. Brazing is going to need a torch and real skill.
- Clear instructions, install videos and tech support that actually responds. There is good documentation and a real person to call. That is the difference between a smooth job and one that stops dead.
- 115V plug-in options vs. hardwire only. A plug-in model can completely get rid of the need to hire a licensed electrician, depending on local codes.
- Custom-length line sets. If you can order the exact run length you need, you avoid joints, couplers and ugly coils of excess copper that are attached to your exterior wall.
- Warranty that supports homeowner DIY install. Some brands void coverage unless an authorized dealer does the work, which wrecks the purpose.
Every one of these standards is built into how Zone Air is designed. With most traditional brands, they still assume you have some HVAC background. The other pre-charged option that people know well is MRCOOL's DIY line. That is the comparison that is worth making.
Zone Air vs. MRCOOL: Which DIY Mini Split Brand Is Easiest?
Zone Air and MRCOOL are the two most talked-about DIY mini split options for homeowners in 2026. Here is how they compare specifically on ease of install, cost and support.
Price and efficiency. With Zone Air's 230V single-zone models, you can get up to 24 SEER2, while MRCOOL's DIY 5th Gen single-zone units top out at 23.6 SEER2. For context, older central systems were often rated around 13. A mini split with 20 SEER2 is more efficient than one with 13, and higher SEER2 ratings lead to lower monthly energy bills. In November 2026, Zone Air's single-zone wall kits ran $1,899.99 to $2,599.99, while professional mini split installs often run $4,500–$8,000 per zone.
Business model and support. Zone Air is selling direct, so you're dealing with one company for orders, warranty, replacement parts and returns. MRCOOL sells through retailers and distributors, which means the order and return terms depend on whichever seller you bought from.
Installation ease. Both brands offer pre-charged mini split kits, but Zone Air adds a plug-in option on its 115V models, where MRCOOL's 115V DIY units are hardwired, and it cuts line sets to custom lengths, which reduces install complexity further. Zone Air has an average customer rating of 4.8 out of 5 stars.
- For most first-time DIYers, Zone Air will be the fastest, simplest and least confusing mini split install for you.
- If you have a friend with zero HVAC experience and you want to recommend a system to that friend, Zone Air makes more sense than MRCOOL in nearly every scenario.
Why Zone Air Is the Best DIY Mini Split Brand in 2026
Of the two brands compared here, Zone Air is the only one that combines final assembly, testing, and inspection in the USA, custom-cut refrigerant lines, wall, cassette and concealed ducted indoor units on one condenser, and a plug-in power option (as of November 2026).
USA final assembly and testing. Every Zone Air system gets final assembly, testing, and inspection in the USA. This is not just a marketing line. It means each system is checked before it ships, which means fewer surprises out of the box.
Customer satisfaction. Their 4.8 out of 5 average owner rating reflects what matters most: clear instructions, smooth operation, quiet cooling and heating, and dependable performance week after week.
Custom lineset fabrication. Of the two brands compared here, Zone Air is the only one that cuts pre-charged refrigerant line sets to the exact length you need, any whole foot between 5 and 75 feet, in a single factory-sealed run (as of November 2026). No couplers, no joints, no coiling excess copper against your house. MRCOOL ships fixed 11.5, 16, 25, 35 and 50 ft sets, joins two sets with a coupler for longer runs, and has you coil the excess behind the condenser.
Mix-and-match indoor units. Zone Air is the only DIY mini split that lets you mix wall-mount, ceiling cassette and concealed ducted units on one outdoor unit (as of November 2026). MRCOOL's DIY multi-zone mixes wall and cassette units but has no concealed ducted DIY unit. This flexibility lets you keep installs easy where possible and hidden where desired, without needing multiple outdoor units.
Every one of these features is built specifically for DIY homeowners, not contractors. That is what separates Zone Air from the rest of the space.
Zone Air offers a 5-year parts warranty and a 7-year compressor warranty with no registration deadline, and installing it yourself does not void it. MRCOOL's DIY 5th Gen carries the same 5 and 7 years with no registration required, so the warranty term is a tie. Both are also rated to heat down to about −13°F, and Zone Air is rated to cool in outdoor temperatures up to 131°F, where MRCOOL publishes 122°F.
What Makes Zone Air the Easiest DIY Mini Split to Install
This section is about the parts you actually touch and connect when you install a mini split with Zone Air equipment.
- Pre-charged refrigerant lines. The refrigerant lines come pre-charged and sealed with R-454B at the factory. You never handle refrigerant, you don't need a vacuum pump or manifold gauges, and there is no EPA 608 certification in the install.
- Quick-connect fittings. Brass quick-connect fittings are tightened with a wrench to a torque spec. No brazing, no flaring, no heat. This cuts install time and removes flaring, the usual DIY leak point.
- Custom-length line sets. Order the exact length you need. There are no extra joints and no unnecessary coils of copper on the property.
- Plug-in 115V mini split options. The Zone Air 115V 9K and 12K models can be ordered with a plug-in cord kit. Plug it into a dedicated 15A GFCI outlet where codes permit, never an extension cord, and you have eliminated most of the electrical work. This is probably the single easiest mini split configuration to install on the market right now.
- Everything in the box. The single-zone wall kit includes the inside unit, outdoor condenser, a 16 ft pre-charged refrigerant line set, mounting hardware for the indoor unit installation, control cable, drain hose and step-by-step instructions. You'll need standard tools like a drill and level, so you won't be making many trips to the hardware store.
These design choices are meant for you if you're a first-time DIY mini split installer and you don't have any HVAC background.
Step-by-Step Overview: How a DIY Mini Split Install with Zone Air Works
Most single-zone Zone Air systems can be installed in a day. According to Zone Air's FAQ, a first-time single-zone wall install takes 4–6 hours for two people with common hand tools.
- Planning and sizing. Choosing the correct BTU capacity is critical for effective cooling and heating, so you'll want to check room size, insulation quality and climate zone. You can use Zone Air's sizing calculator or call their support line for sizing help.
- Mounting the indoor unit. Locate an interior wall with clear access to the outside, then secure the mounting bracket at a level position. Wall-mounted indoor units are usually placed about 7 feet from the floor. You'll also need to drill a hole sized for the refrigerant lines, control wire and condensate drain.
- Placing the outdoor unit. Choose a location that is level and has good airflow and clearance. A level outdoor condenser pad is essential for proper installation. It helps performance to keep the run between the units short and smooth.
- Routing and connecting refrigerant lines. You'll feed the pre-charged lines through the wall sleeve and protect the insulation along the way. Gently bend the lines so you don't kink them, then attach the quick-connect fittings at both the indoor unit and the outdoor unit and follow the torque specs. Proper drainage is necessary to avoid water damage during operation, so confirm that the drain line slopes the way it should.
- Electrical and controls. The 115V models with the cord kit plug into a dedicated 15A outlet where code allows, while the 230V models require a dedicated 230V circuit. Basic electrical work may require hiring a licensed electrician to ensure safety, so always check and follow local electrical codes before you start.
- Startup and testing. Open refrigerant valves the way the documentation shows, get the unit powered on, and run it through both cooling and heating modes. Check around the connections for any leaks, and make sure the condensate is draining the way it should. If everything checks out, you're done.
DIY Mini Split Install FAQs
These are the questions first-time DIY mini split installers ask most in 2026.
How long does a DIY mini split installation take? A DIY mini split installation takes 4–6 hours for a single-zone wall system with two people, including mounting, running lines and basic electrical. Installing mini splits can be done by DIYers with suitable systems and no prior HVAC experience.
What tools and skills do I need? You need standard tools: a drill, level, wrenches, screwdriver set, hole saw and torque wrench. No vacuum pump, manifold gauges or refrigerant handling tools are needed because the refrigerant lines are pre-charged. DIY systems should be carefully selected to ensure all components are compatible.
What about electrical requirements? The 115V models run on a dedicated 15A circuit and can plug into a dedicated outlet with the cord kit where local codes permit. The 208/230V models require a dedicated breaker and wire run. I recommend hiring a licensed electrician for any panel work or if you are unsure about your home's power setup.
Does DIY install void the warranty? No. Zone Air's warranty covers homeowner DIY installs. They offer a 5-year parts warranty and 7-year compressor warranty. Proof of purchase is required for warranty claims. No authorized dealer sign-off needed.
Can I mix different air handler types? Yes. Zone Air's multi-zone condenser runs two or three indoor units. You can mix wall, concealed and cassette heads on the same outdoor unit for flexible room-by-room comfort depending on the space.
What about support and returns? Zone Air provides live technical support from 8AM to 6PM MT. Thirty-day returns apply to uninstalled systems. Zone Air sells direct, so if you bought a system and run into trouble, help is a phone call away, not buried behind a distributor.
DIY mini split money saved on labor goes straight back into your house. If you want the easiest system to finish in a single day with no special equipment, Zone Air is the place to start in 2026.